
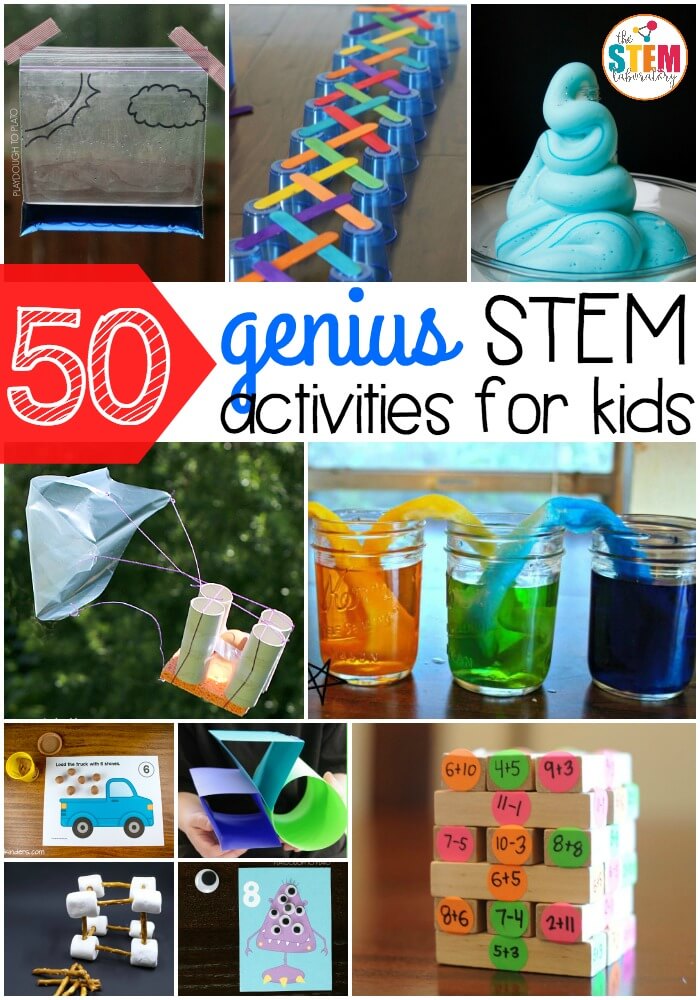
Learning science, technology, engineering, and mathematics does not have to happen only in a classroom or laboratory. Students can explore these subjects at home through simple experiments, creative building challenges, and practical activities that encourage curiosity. With everyday materials such as paper, cardboard, water, string, cups, and recycled containers, young learners can investigate scientific concepts and develop useful problem-solving skills.
Easy STEM projects for students make learning more interactive by allowing children to test ideas, observe results, and improve their designs. Instead of simply reading about gravity, forces, electricity, or plant growth, students can experience these concepts through hands-on activities.
Home-based STEM projects can also help students become more independent learners. They encourage creativity, patience, logical thinking, and the ability to learn from mistakes. Whether a student is preparing for a school science exhibition or looking for an engaging weekend activity, simple STEM projects can turn ordinary household materials into valuable learning tools.
What Are STEM Projects?
STEM projects combine science, technology, engineering, and mathematics to help students understand how the world works. These activities often involve asking a question, designing a solution, conducting an experiment, or creating a model.
Each STEM discipline contributes something different to the learning process.
- Science: Helps students investigate natural phenomena and understand why things happen.
- Technology: Introduces tools and digital systems that help people solve problems.
- Engineering: Encourages students to design, build, test, and improve solutions.
- Mathematics: Develops skills in measurement, calculation, patterns, and data analysis.
For example, when students build a paper bridge, they use engineering to design the structure, mathematics to measure its dimensions, and science to investigate strength and stability.
The best STEM projects give students opportunities to explore more than one subject while working toward a clear goal.
Why Are Easy STEM Projects Important for Students?
Hands-on STEM activities offer several educational benefits when they are connected to meaningful learning objectives.
1. Develops Critical Thinking
STEM projects encourage students to ask questions, make predictions, and examine evidence. Rather than accepting an explanation without investigation, learners can test their ideas and decide whether the results support their predictions.
For example, students building a paper airplane can predict which design will travel the farthest. They can then conduct several flights, measure the distances, and compare the results.
This process develops logical reasoning and helps students understand the value of evidence.
2. Improves Problem-Solving Skills
Many STEM challenges do not have a single perfect solution. Students may need to try different approaches before finding one that works.
Building a tower from paper, for instance, requires learners to consider balance, height, material use, and stability. If the structure collapses, they can identify weaknesses and adjust their design.
These experiences teach students to approach challenges systematically instead of giving up when the first attempt fails.
3. Encourages Creativity
Creativity is essential in engineering, technology, and scientific discovery. Students can express their ideas by designing original structures, inventing simple devices, and finding new uses for familiar materials.
Open-ended STEM activities allow children to make decisions about materials, shapes, colors, and construction methods. They learn that different ideas can lead to different solutions.
4. Connects Learning With Everyday Life
STEM concepts appear in many ordinary activities. Cooking involves measurement and proportions, gardening introduces biology, and building with cardboard demonstrates structural design.
When students explore these connections, classroom concepts become easier to understand and apply.
5. Builds Confidence and Independence
Completing a project gives students a practical result they can observe, demonstrate, and explain. Even when an experiment does not work as expected, learners can gain confidence by identifying the problem and trying again.
Over time, these experiences encourage independence and a willingness to investigate unfamiliar challenges.
10 Easy STEM Projects for Students to Try at Home
The following projects use accessible materials and can be adapted to different ages and skill levels. Younger students should work with an adult when an activity involves small objects, cutting tools, or other potential hazards.
1. Build a Paper Bridge
<text>Subjects: Engineering, physics, and mathematics
Estimated time: 20–30 minutes
Materials: Paper, two stacks of books, coins or other small weights, and a ruler.</text>
<text>Objective: Discover how the shape of a structure affects its strength.</text>
Steps to Build the Paper Bridge
- Place two stacks of books a short distance apart to create a gap.
- Lay a flat sheet of paper across the gap.
- Add coins one at a time to the center of the paper until it bends too much to support the load.
- Remove the weights and fold a new sheet of paper into an accordion shape.
- Place the folded paper across the same gap.
- Add the same type of weights gradually and record how many the bridge supports.
What Students Learn
Students discover that changing the shape of a material can improve its ability to support a load. The folded paper may hold more weight because its shape increases stiffness and resists bending.
To extend the experiment, students can compare several designs, measure the gap, and create a table showing how much weight each bridge supports.
This project is useful for learning about structural engineering and the importance of testing designs under consistent conditions.
2. Create a Walking Water Experiment
<text>Subjects: Science and biology
Estimated time: 15 minutes to set up, with results developing over several hours</text>
<text>Materials: Three or more clear cups, water, food coloring, and paper towels.</text>
<text>Objective: Observe how water moves through absorbent materials.</text>
Steps to Create Walking Water
- Arrange three cups in a row.
- Fill the first and third cups with water.
- Add different food colors to the two cups.
- Fold paper towels into long strips.
- Place one end of a paper towel in the first cup and the other end in the middle cup.
- Repeat with another paper towel connecting the middle cup to the third cup.
- Observe the cups over several hours and record the changes.
What Students Learn
Water gradually travels through the tiny spaces in the paper towel fibers through a process called capillary action. The colored water may move into the empty middle cup and mix to form a new color.
Students can record how far the water travels over time and compare different paper towel types.
This activity introduces water movement, absorption, observation, and the scientific process.
3. Design a Balloon-Powered Car
<text>Subjects: Engineering, physics, and mathematics
Estimated time: 30–45 minutes</text>
<text>Materials: Lightweight cardboard, four bottle caps or suitable wheels, drinking straws, wooden skewers, tape, and a balloon.</text>
<text>Objective: Investigate how escaping air can create motion.</text>
Steps to Build a Balloon-Powered Car
- Cut a small rectangular piece of cardboard for the car’s body.
- Ask an adult to help prepare the axle holes if cutting or sharp tools are needed.
- Attach two straws underneath the cardboard to hold the axles.
- Insert the axles and attach the wheels, ensuring they can rotate freely.
- Secure a balloon to a short straw and tape the assembly to the car so the straw points backward.
- Inflate the balloon through the straw and pinch the opening closed.
- Place the car on a smooth surface, release the balloon, and observe its movement.
What Students Learn
As air escapes backward, the car moves forward. This demonstrates how forces can produce motion.
Students can investigate how balloon size, car mass, wheel alignment, and surface type affect the distance traveled. Change one factor at a time and repeat each trial to make the comparison more reliable.
4. Build a Simple Water Filter
<text>Subjects: Environmental science, engineering, and earth science
Estimated time: 30 minutes</text>
<text>Materials: A clear plastic bottle, clean gravel, clean sand, cotton or filter cloth, a container, and muddy water prepared with soil.</text>
<text>Objective: Explore how different materials can remove visible particles from water.</text>
Steps to Build the Filter
- Ask an adult to cut the bottom off a clean plastic bottle.
- Turn the bottle upside down and position it over a separate collection container.
- Place cotton or filter cloth near the bottle opening.
- Add layers of clean sand and gravel above the cloth.
- Slowly pour the muddy water into the filter.
- Observe the water collected below and compare it with the original sample.
What Students Learn
The layers can trap some suspended particles, making the collected water appear clearer. Students can compare different filter arrangements and record which removes the most visible dirt.
Important safety note: Filtered water is not necessarily safe to drink. This model does not reliably remove harmful microorganisms, dissolved chemicals, or all contaminants. Never drink water produced by this experiment.
The activity introduces filtration, environmental protection, and the importance of access to safe drinking water.
5. Make a Balloon-Powered Air Pressure Demonstration
<text>Subjects: Physics and engineering
Estimated time: 15–20 minutes</text>
<text>Materials: An empty plastic bottle, a balloon, and a small amount of water if needed for testing.</text>
<text>Objective: Investigate how air pressure and airflow affect objects.</text>
Steps to Try the Activity
- Stretch a balloon over the opening of a clean, empty plastic bottle.
- Observe what happens when you try to inflate the balloon while it remains attached to the bottle.
- With adult assistance, create a small ventilation opening in the bottle away from the balloon and any sharp edges.
- Try inflating the balloon again.
- Compare the two attempts and explain the difference.
What Students Learn
Air already trapped inside the bottle resists being compressed as the balloon expands. When air can escape through the ventilation opening, the balloon has more room to inflate.
Students can discuss how air occupies space and how pressure changes when the available space or airflow changes.
The bottle should be prepared by an adult, and the experiment should be conducted with a clean, undamaged container.
6. Grow a Bean Seed and Track Its Development
<text>Subjects: Biology, environmental science, and mathematics
Estimated time: 5–10 minutes to set up, followed by several days of observation</text>
<text>Materials: Bean seeds, a clear container, paper towels or cotton, and water.</text>
<text>Objective: Observe the early stages of plant growth.</text>
Steps to Grow a Bean Seed
- Place a damp paper towel inside a clear container.
- Position one or two bean seeds between the towel and the container wall.
- Keep the towel moist but avoid filling the container with water.
- Place the container in a suitable location with appropriate warmth and light.
- Check the seeds daily and add a little water when necessary.
- Record changes such as seed swelling, root development, and the appearance of the shoot.
What Students Learn
Students can observe germination and investigate the conditions that support plant growth. They can draw the seed at different stages, measure root length, and record the number of days before visible changes occur.
For a more advanced experiment, compare seeds under different conditions while changing only one factor at a time. Make sure each group receives the conditions needed for a fair test.
This project connects biology with measurement, data recording, and environmental awareness.
7. Design a Parachute for a Small Toy
<text>Subjects: Physics, engineering, and mathematics
Estimated time: 25–40 minutes</text>
<text>Materials: Tissue paper or a lightweight plastic sheet, string, tape, scissors, and a small lightweight toy.</text>
<text>Objective: Explore how parachute design affects falling speed.</text>
Steps to Build a Parachute
- Cut a square or circular canopy from lightweight material.
- Attach four equal lengths of string to evenly spaced points around its edges.
- Connect the loose ends of the strings to a lightweight toy.
- Check that the strings are secure and the canopy can open freely.
- Release the parachute from a safe, consistent height.
- Observe how it falls and repeat the test with different canopy sizes.
What Students Learn
A parachute experiences air resistance as it falls. A larger canopy can create more drag under suitable conditions, which may reduce its falling speed.
Students can compare designs by timing several drops from the same height. They should keep the payload and release method consistent to make the results easier to interpret.
Conduct this activity indoors or in a safe open area from a low height. Never drop objects from rooftops, balconies, or other elevated locations where people could be injured.
8. Create a Paper Airplane and Test Its Flight
<text>Subjects: Physics, engineering, and mathematics
Estimated time: 20–30 minutes</text>
<text>Materials: Sheets of paper, a measuring tape, and a notebook.</text>
<text>Objective: Investigate how design changes influence flight distance.</text>
Steps to Test Paper Airplanes
- Fold a sheet of paper into a simple airplane.
- Mark a starting line in a clear, open space.
- Throw the airplane from behind the line using a consistent motion.
- Measure the distance from the starting line to the landing point.
- Repeat the test several times and calculate the average distance.
- Build a second design and compare its performance using the same procedure.
What Students Learn
Paper airplanes provide a simple way to explore forces, air resistance, balance, and the effects of design. Students can investigate how wing shape, folds, and weight distribution influence flight.
They should avoid changing several features at once. Testing one design variable at a time helps them identify which change may have affected the results.
9. Build a Marshmallow and Spaghetti Tower
<text>Subjects: Engineering, geometry, and mathematics
Estimated time: 25–40 minutes</text>
<text>Materials: Dry spaghetti, marshmallows, a ruler, and a flat building surface.</text>
<text>Objective: Discover how geometric shapes contribute to structural stability.</text>
Steps to Build the Tower
- Gather the spaghetti and marshmallows.
- Use the marshmallows as connectors and the spaghetti as structural supports.
- Build a small square-based structure.
- Add diagonal supports to create triangular sections.
- Continue building upward while checking whether the structure remains balanced.
- Measure the finished tower and record its height.
- If it collapses, identify the weakest area and redesign it.
What Students Learn
Students discover how the arrangement of structural supports affects stability. Triangles can help structures maintain their shape because their sides constrain movement more effectively than a simple flexible square frame.
The challenge encourages creativity, spatial reasoning, measurement, and teamwork.
Use the marshmallows only as building materials during the experiment, and do not eat materials that have been handled or contaminated during construction.
10. Make a Simple Sundial
<text>Subjects: Earth science, astronomy, and mathematics
Estimated time: 15 minutes to prepare, followed by observations throughout the day</text>
<text>Materials: Cardboard, a pencil or straight stick, a ruler, and a marker.</text>
<text>Objective: Observe how the apparent position of the Sun changes the direction of a shadow.</text>
Steps to Make a Sundial
- Place the cardboard on a flat outdoor surface in a sunny location.
- Secure the pencil or stick upright in the center.
- Mark the position of its shadow at a particular time.
- Record the time beside the mark.
- Return at later times and mark the new shadow positions.
- Compare the length and direction of the shadows throughout the day.
What Students Learn
The apparent movement of the Sun across the sky causes shadows to change direction and length. The pattern provides a simple introduction to Earth’s rotation and the relationship between sunlight and time.
Students can use the observations to create a chart or investigate why shadows are generally shorter around local solar noon than early or late in the day.
For reliable observations, keep the sundial in the same position and make sure it remains exposed to sunlight.
How to Turn a Simple STEM Activity Into a Real Experiment
Building a model is a useful starting point, but students learn more when they investigate a clear question and evaluate their results. A simple activity can become a structured experiment through a few additional steps.
Step 1: Ask a Clear Question
Choose something specific to investigate.
For example: Does a wider paper bridge support more weight than a narrow paper bridge?
A focused question helps students understand what they are testing.
Step 2: Make a Prediction
Before starting, students should write what they think will happen and explain why.
A prediction does not need to be correct. Its purpose is to encourage learners to think about the science behind the experiment.
Step 3: Identify the Variables
The independent variable is the factor students deliberately change. The dependent variable is the result they measure. Other important conditions should remain as consistent as possible.
In the paper bridge experiment, students might change the bridge design while keeping the gap, paper type, and weight of each coin consistent.
Step 4: Record Observations
Students should write down measurements, describe visible changes, and note anything unexpected.
Tables, drawings, and simple graphs make it easier to compare results and identify patterns.
Step 5: Repeat the Test
A single result may be affected by accidental differences. Repeating the experiment can help students determine whether the same pattern appears consistently.
Step 6: Explain the Results
Students should compare their observations with their original prediction and explain what the evidence suggests.
They should also identify possible sources of error and suggest improvements for the next attempt.
This process helps transform easy STEM projects for students into meaningful learning experiences based on investigation and evidence.
Safety Tips for STEM Projects at Home
Home STEM activities should be engaging, age-appropriate, and safe. Students should understand the materials they are using and know when adult assistance is necessary.
Follow these practical precautions:
- Ask an adult to supervise activities involving cutting tools, small parts, or unfamiliar materials.
- Avoid household chemicals, unknown substances, and experiments that produce dangerous fumes.
- Never connect homemade projects to household electrical outlets.
- Keep small objects away from young children who may swallow them.
- Use lightweight materials for flight and falling-object experiments.
- Clean work surfaces after completing an activity and wash hands when appropriate.
- Never drink water used in filtration experiments.
- Stop an experiment if a container breaks or a material behaves unexpectedly.
Safety is an important part of scientific thinking. Students should learn to identify possible hazards, plan carefully, and select appropriate materials before beginning a project.
How Parents Can Support STEM Learning at Home
Parents do not need specialized scientific knowledge or expensive equipment to help children explore STEM subjects. Their most important role is to encourage curiosity and provide opportunities for investigation.
Create a Small STEM Workspace
A table with paper, cardboard, pencils, rulers, tape, string, and reusable containers can support many projects. Keep materials organized so students can focus on their ideas rather than searching for supplies.
Encourage Questions
When children ask why something happens, encourage them to explain their thoughts before providing an answer.
Questions such as “What do you think will happen next?” and “How could we test that idea?” help children develop scientific reasoning.
Let Children Make Decisions
Allow students to select materials, design structures, and propose changes. Adults can provide guidance and manage safety without taking over the entire project.
Celebrate Improvement
A successful project does not always have to look perfect or produce the expected result. Recognize careful observation, thoughtful questions, persistence, and improvements between attempts.
This approach helps children see learning as a process of discovery rather than a competition to produce the best-looking model.
Choosing the Right STEM Project for Each Age Group
Different projects suit different levels of experience. Choosing an appropriate challenge helps students remain engaged without becoming overwhelmed.
Preschool and Early Elementary Students
Younger children benefit from short activities involving colors, water, blocks, shadows, and simple building materials. Adult guidance is important, especially when projects involve small objects.
Suitable examples include walking water, basic tower building, and observing seed growth.
Upper Elementary Students
Students at this level can begin measuring results, comparing designs, and recording observations independently.
Paper bridges, paper airplanes, parachutes, and seed-growth investigations offer opportunities to practice these skills.
Middle School Students
Middle school learners can work with more detailed measurements, controlled comparisons, and multi-step construction challenges.
Balloon-powered cars, water filtration models, and structured engineering experiments can help them apply scientific principles.
High School Students
Older students can design their own research questions, analyze data, create digital models, or develop more complex prototypes.
They may also investigate energy efficiency, environmental monitoring, coding, or the engineering principles behind everyday devices.
These are flexible suggestions rather than strict age limits. Teachers and parents should adjust the difficulty according to each student’s abilities, interests, and experience.
Frequently Asked Questions About Easy STEM Projects for Students
What are the easiest STEM projects students can build at home?
Paper bridges, walking water, paper airplanes, seed-growing experiments, and simple towers are good starting points. They use common materials and demonstrate scientific or engineering concepts without requiring specialized equipment.
Do STEM projects require expensive materials?
No. Many effective STEM activities use paper, cardboard, string, water, recycled containers, and other everyday materials. The educational value comes from the questions students investigate, the methods they use, and how they interpret their results.
Which STEM projects are suitable for a school science exhibition?
Projects such as paper bridge testing, balloon-powered cars, water filtration models, and plant-growth investigations can work well for school exhibitions. Students should be able to explain the scientific principle, describe their procedure, show their observations, and discuss what they learned.
How do STEM projects improve problem-solving skills?
STEM projects require students to identify challenges, develop possible solutions, test their ideas, and improve their designs. Repeating this process helps learners become more systematic, adaptable, and confident when facing unfamiliar problems.
Can students complete STEM projects without adult help?
Some simple activities may be suitable for independent work by older students, but the appropriate level of supervision depends on age, materials, and project complexity. Adults should supervise younger children and any activity involving sharp tools, electrical components, heat, or potentially hazardous materials.
How can students make a STEM project more impressive?
Students can improve a project by testing different designs, collecting measurements, creating graphs, explaining the science clearly, and documenting changes between attempts. A well-explained investigation often demonstrates more learning than a complicated model that cannot be explained.
How long should a home STEM project take?
Simple activities may take 15–30 minutes, while construction projects can require an hour or more. Investigations involving plant growth or repeated observations may take several days. The best choice depends on the student’s age, available time, and learning goals.
Conclusion
Easy STEM projects for students provide a practical way to explore science, technology, engineering, and mathematics outside the classroom. By building paper bridges, testing parachutes, observing plant growth, and designing simple vehicles, learners can discover how scientific principles apply to everyday situations.
These activities also encourage critical thinking, creativity, measurement, collaboration, and persistence. Students learn to ask questions, test predictions, evaluate evidence, and improve their ideas when the results differ from their expectations.
Parents and teachers can make STEM learning more effective by choosing age-appropriate challenges, using accessible materials, encouraging independent thinking, and maintaining safe working conditions.
The most valuable STEM project is not necessarily the largest or most complicated one. It is the project that encourages students to ask meaningful questions, understand the results, and become curious about what they can discover next.
